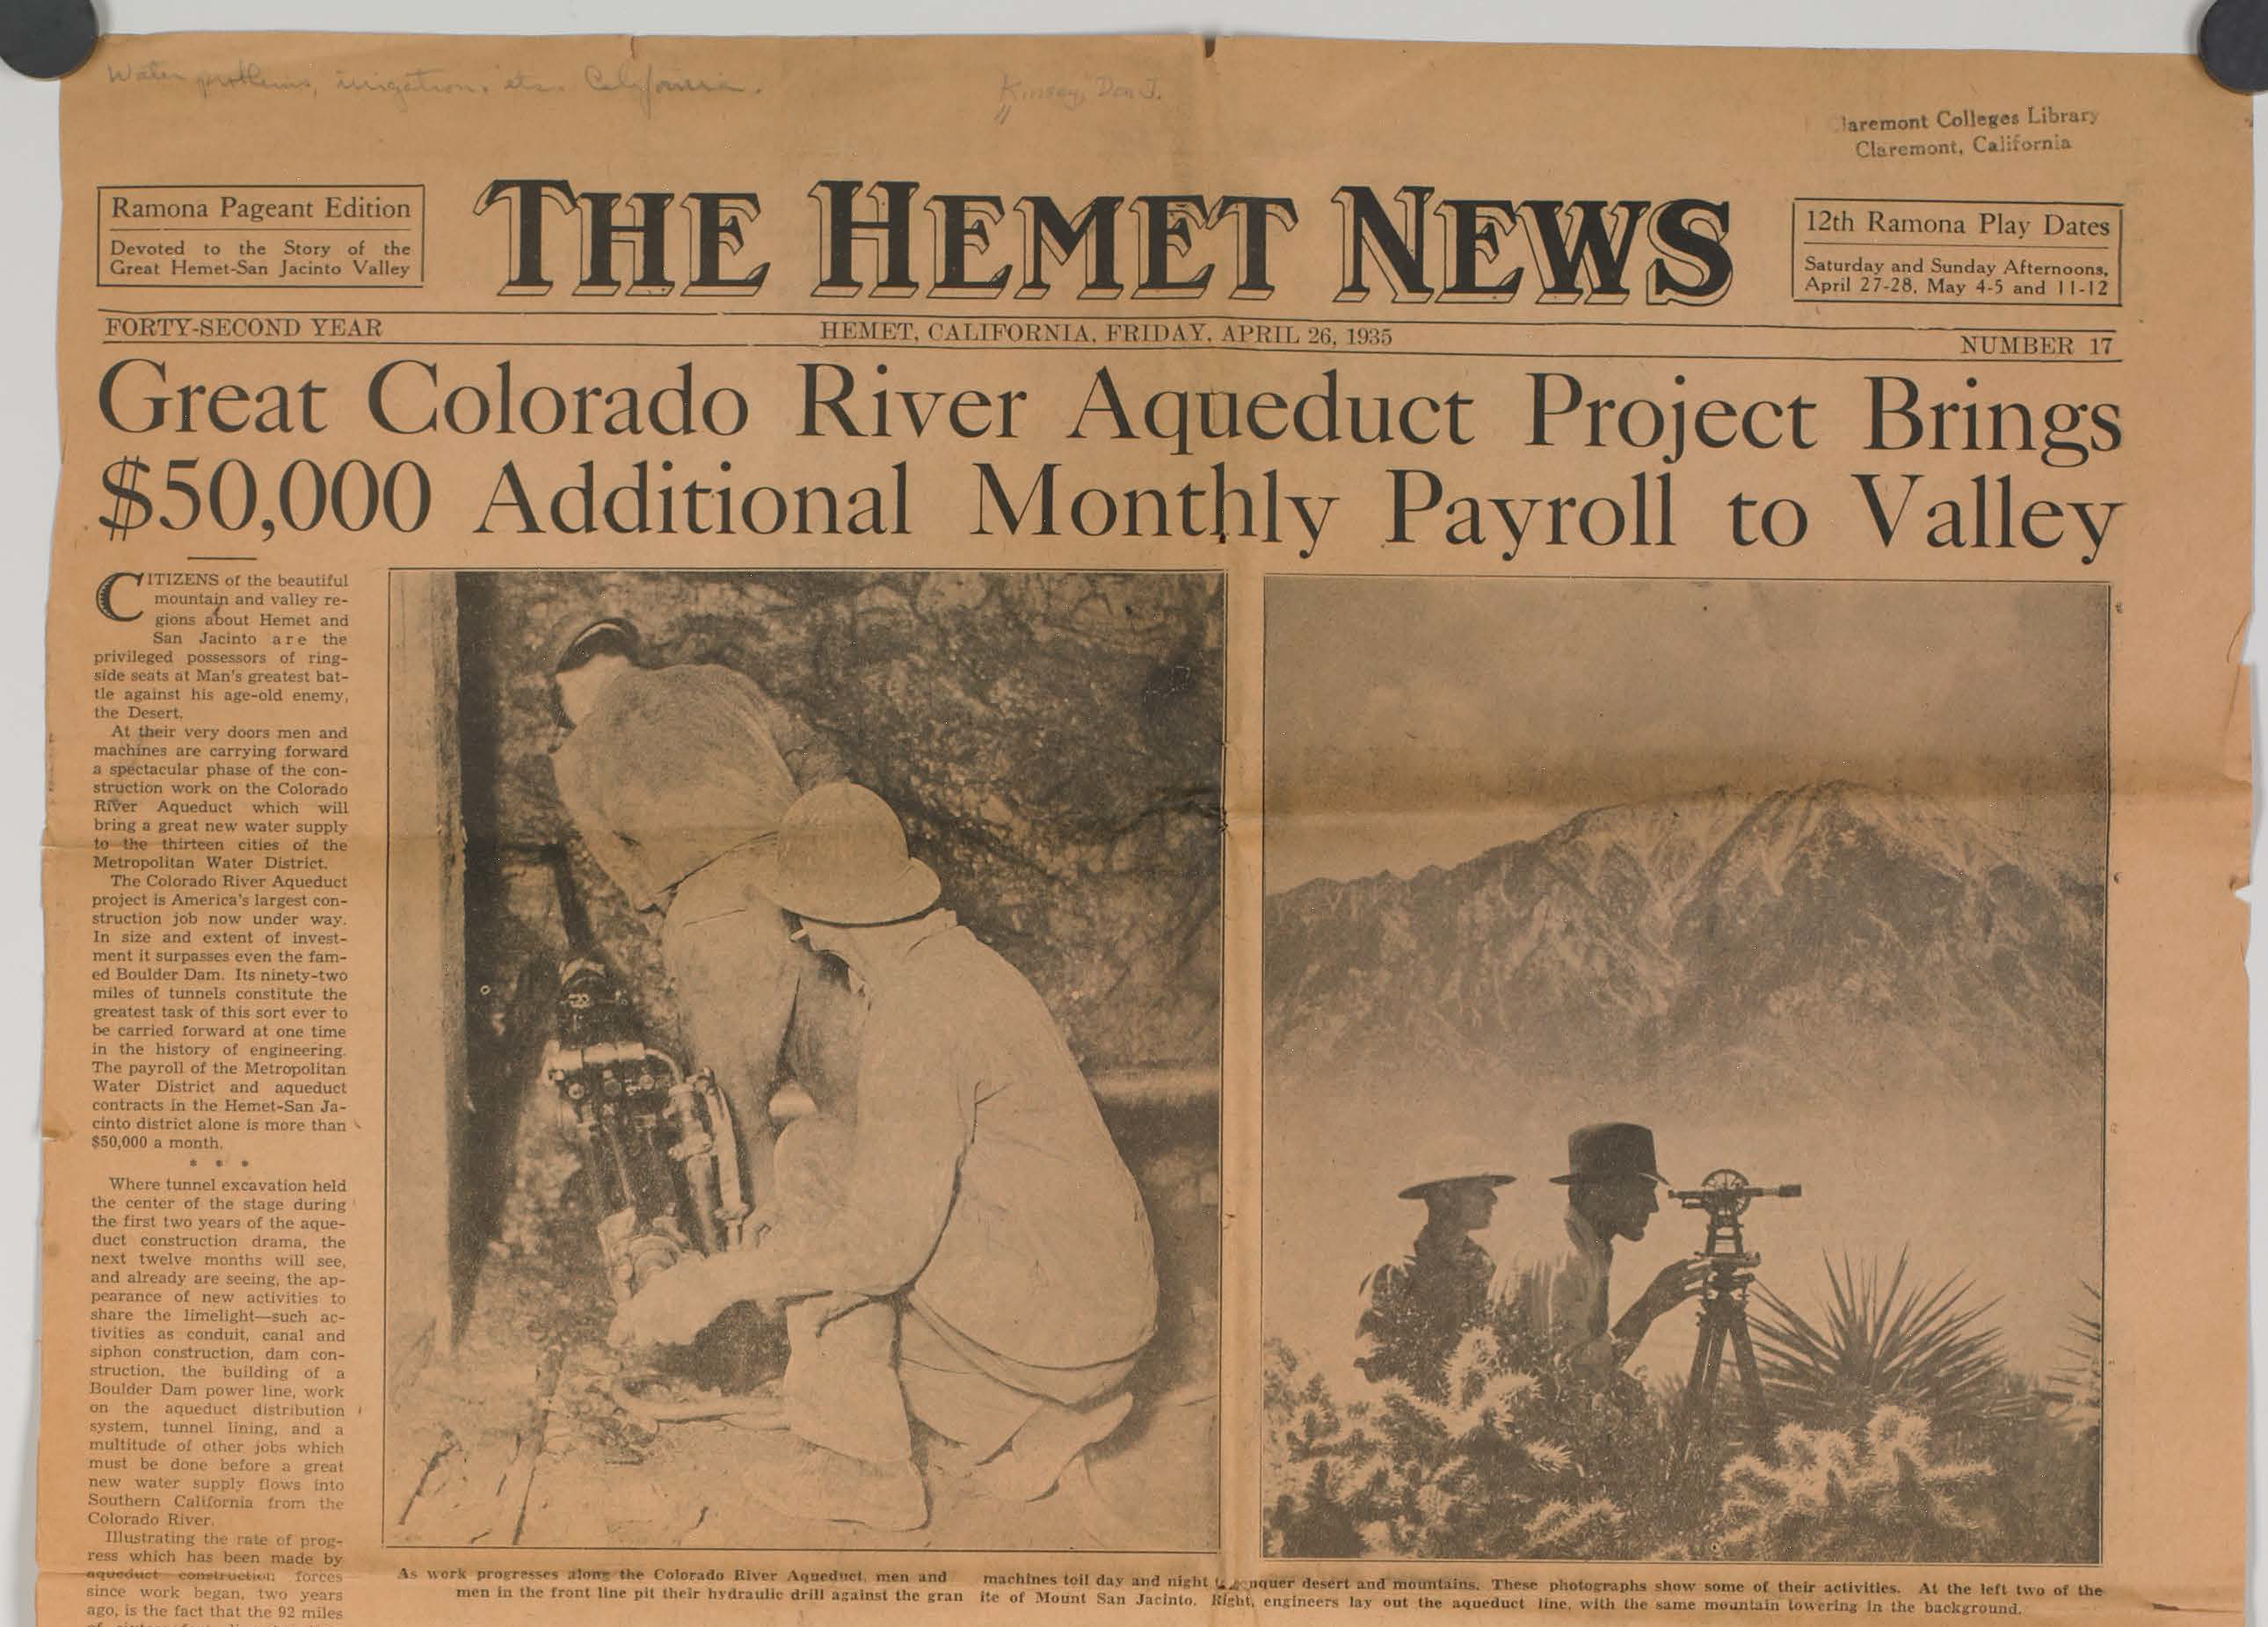
Hello! This week I accomplished a very impressive task – I successfully took photos of documents, and I am now a budding photographer. Typically photos are taken when documents are too large to be scanned, and this week a folder of newspaper articles and a few maps fell into that category. The first step of taking these photos is going to the camera room, a room on the first floor of the library with all the equipment we need – lights, a tripod, a whiteboard, a computer, and for good measure, the camera. The first decision that needs to be made after going into the room is how the item should be photographed, specifically whether it should be attached to the whiteboard with magnets and then be taken photos of, or whether it must be laid out on a flat surface with the camera lowered or raised depending on the size of the picture. Items that are more fragile are usually laid out, while those that can be hung without being damaged are usually photographed on the whiteboard. Then the distance between the camera is adjusted so the item is captured in its entirety, and the camera itself adjusted to make sure that the item is clear. Once a photo is taken, a software on the computer lets us see what it looks like. We usually zoom into the photo at 100 and 200%, and adjust the lens again if writing can’t be seen clearly at those zoom in percentages. The image is then cropped and rotated if necessary in Photoshop, where its color may also be adjusted to more clearly reflect the actual item. It’s a long process, but the end results speak for themselves. Until next time readers, and remain hydrated!